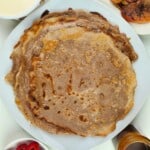
10-Minute Chestnut Flour Crepes (Necci)
A mildly nutty, sweet grain-free crepe made with chesnut flour and filled with whatever your heart desires, from the sweet to the savory.
Servings: 8 8" crepes
Calories: 113.2kcal
Equipment
- flat pan
- large spatula
Ingredients
- 1 cup chestnut flour
- 1½ cups milk oat, almond, dairy, etc.
- 2 eggs can omit, but add ¼ cup more milk
- Dash of salt optional
- Butter or coconut oil for the pan
Instructions
- Blend together your chestnut flour, milk, salt (if using), and eggs in a large bowl until fully smooth (about 1 minute). If you don't have a hand mixer, you can also use a fork and then a powerful milk frother to blend everything thoroughly.
- Take out a large, flat pan and put it over your largest burner (don't use a cast iron pan). Turn the heat on medium-low and use a balled-up paper towel to smear enough oil onto your pan to coat it thoroughly, and let it heat for one minute.
- Once the pan is hot, hold the bowl of batter in your non-dominant hand, and using your dominant hand, ladle about ¼ cup of batter into the center of the pan, making a circle. If your batter turns out very thin, you can also try to make crepes the traditional way. This involves immediately tilting the pan in a circular motion to spread the batter in a thin circle; the thinner, the better, but don't leave it patchy. Not all attempts will be winners, but you don't need a perfect circle to make a great-tasting chestnut crepe. If your fourth try is still as bad as your first, try pulling your pan off the heat and then adding more oil, letting it cool for a minute or so, and then adding the batter before the swish and flick.
- Either way, cook the crepe for 2-3 minutes, then flip it as soon as the bottom is set. You'll know it's set once the edges begin to turn golden and the top is no longer glossy.
- Use your spatula to lift the edges of the crepe, doing this slowly to make sure it hasn't stuck to the pan. Grab your biggest spatula and very gently work it under the crepe, gingerly also using your fingers to flip it over quickly, if needed. Cook the other side for another minute or until just barely done. Don't overcook it or it will dry out.
- Butter the pan again and repeat the process for each successive crepe, remembering to keep buttering the pan in between or the crepes will stick. Add any fillings to your crepes when they're hot, then fold them, flip them over, add final toppings, and enjoy.
Notes
Eggs: you can omit the eggs or swap them for two flax eggs, but if you leave them out completely you'll need to add another ¼ cup of milk to the batter, and your crepes will be much flatter & crispier but less thick.
Large Crepes: to make crepes bigger than the 8" crepes here, make sure you use a much larger flat pan, and consider making eggless chestnut flour crepes so that the batter is thinner and spreads more quickly. Try cooking the first two on low heat for a minute or two longer than called-for so you can monitor how well these larger crepes cook.
Nutrition
Serving: 1g | Calories: 113.2kcal | Carbohydrates: 18.17g | Protein: 2.66g | Fat: 3.21g | Saturated Fat: 3g | Polyunsaturated Fat: 2g | Cholesterol: 50mg | Sodium: 57.19mg | Fiber: 1g | Sugar: 3.61g