


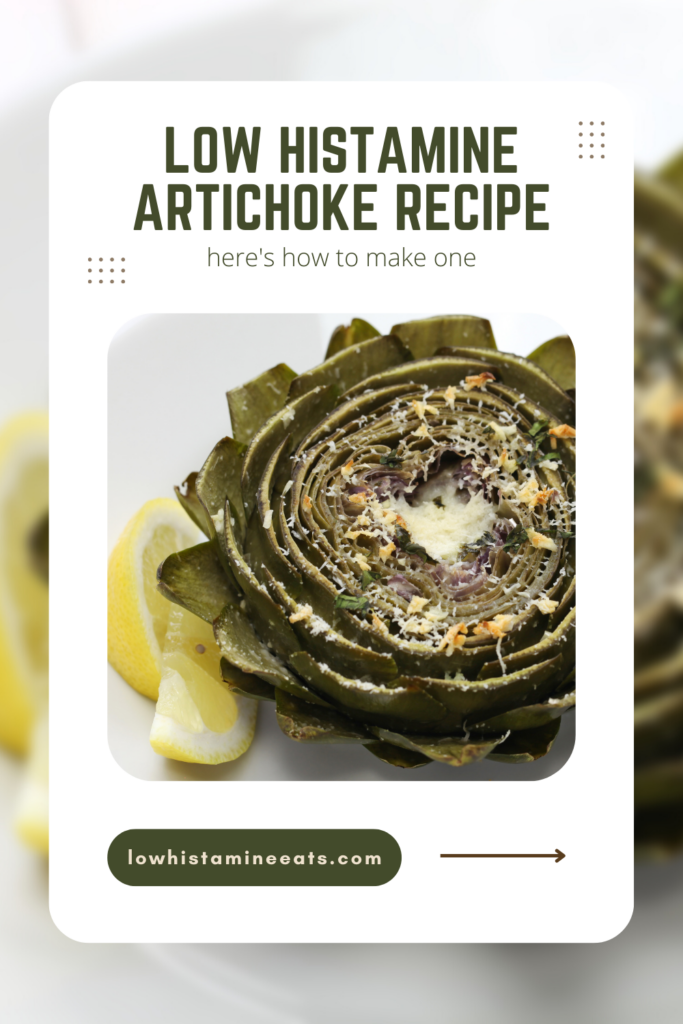
The first time I made this recipe, I spent a good twenty minutes just trying to understand the anatomy of an artichoke, since I’d never actually cooked one before. Once I figured it out, this baked garlic-lemon artichoke quickly became one of my favorite simple appetizers. Roasted until tender and finished with garlic and bright lemon flavor, it’s a creamy, buttery-tasting dairy-free artichoke recipe that works beautifully for a low histamine diet.
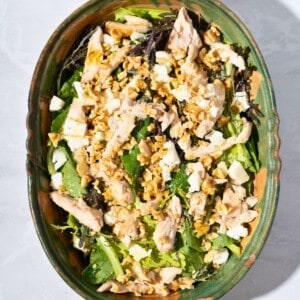
If you like savory side dishes, also check out my curry-spiced Indian brussels sprouts and air fryer broccoli & cauliflower.
Jump to:
✔️ Why This Recipe is Great
Low Histamine Artichoke. When I saw the organic artichokes at my local market, on a whim I told myself that I'd figure it out, put it in my cart, and then left it in my fridge to fester my anxiety. What I learned from that research is that artichokes are a lot like asparagus and brussels sprouts. So to save you the half hour it took me to find a low histamine artichoke recipe (or at least one I could make LH!), here's mine. AND it's actively antihistamine! Bon appétit.
Easy Enough for Beginners. Whether you've never made an artichoke or it's a staple at your place, this lemon-garlic artichoke recipe is simple & detailed enough for anyone to follow.
🍋 Ingredients
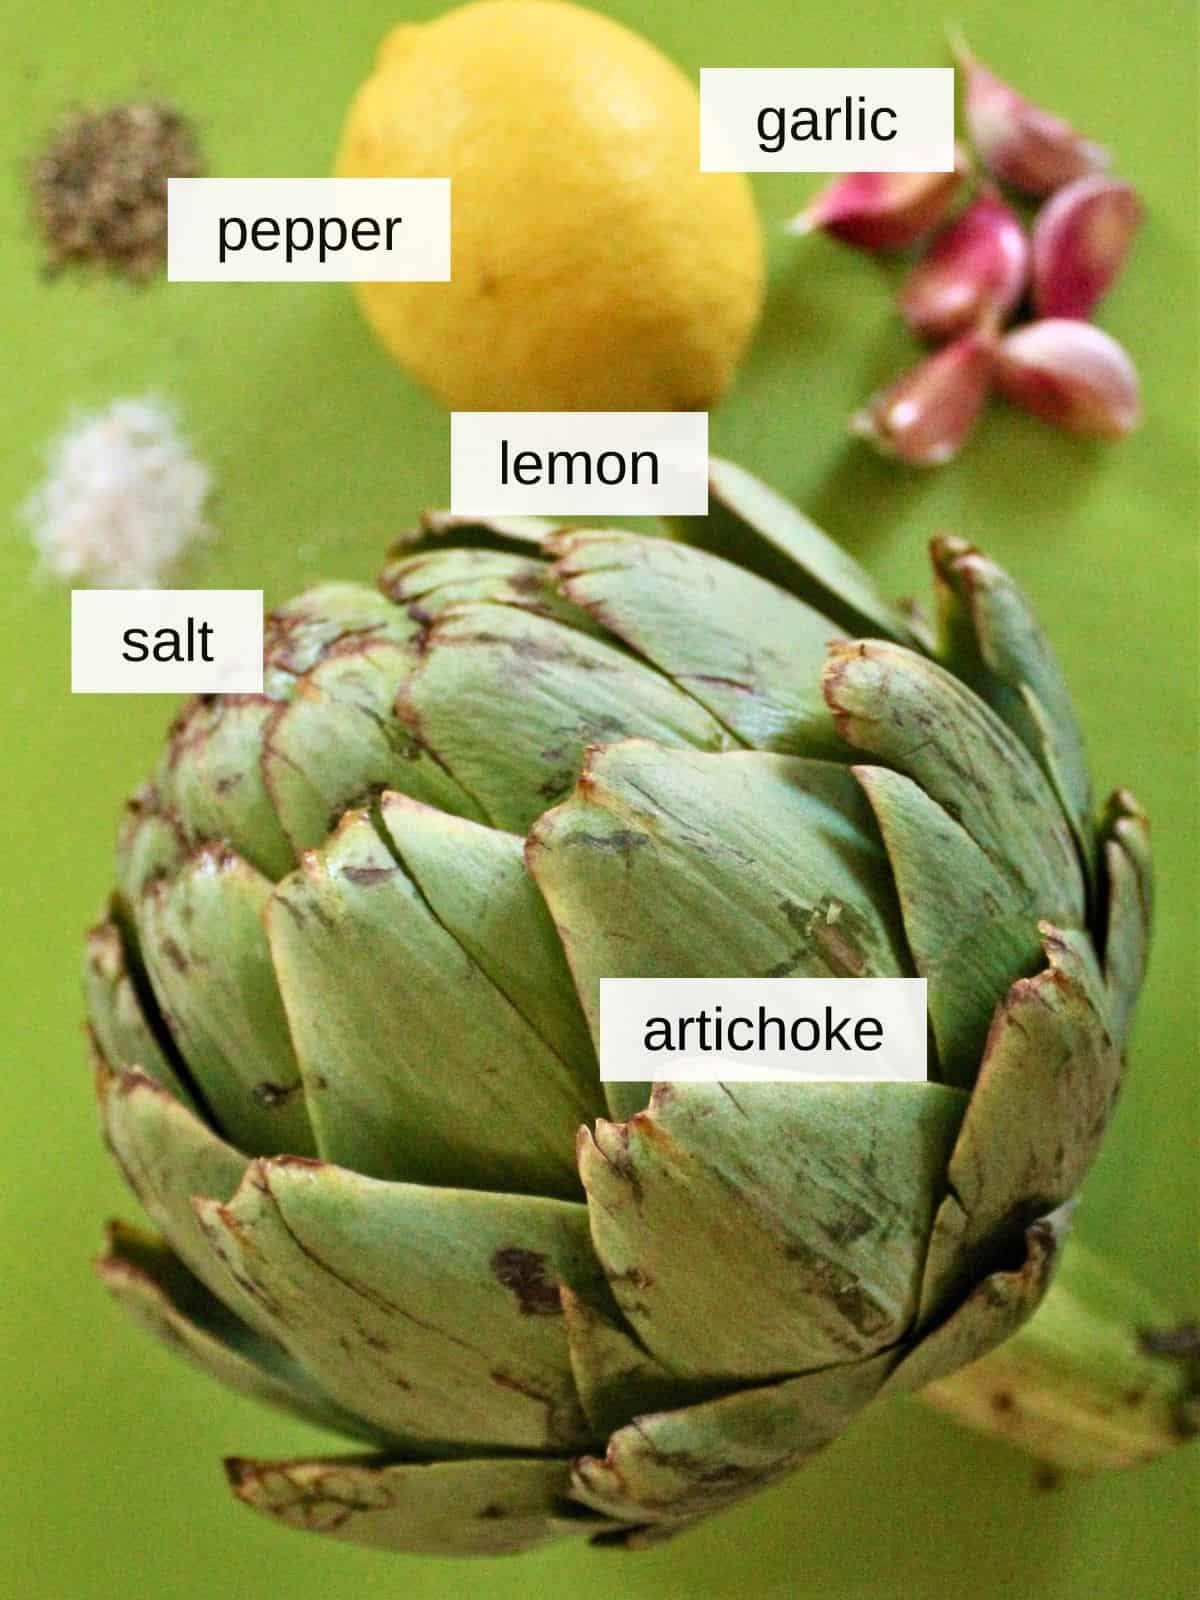
Whole Artichoke: these aren't always available, but when you find a whole artichoke at your local organic market, now you know what you can do with it!
Raw Garlic: all members of the allium family (onion, garlic, scallions, etc.) are rich in the cancer-fighting sulfur-containing substances, which make it a powerful antioxidant. Raw garlic also adds a delicious umami flavor to dishes, and anti-microbial qualities that help your gut foster helpful bacteria.
Lemon Juice: the kick of acid from the lemon juice really accentuates the umami of the garlic and the complexity of the artichoke. Additionally, lemon contains loads of vitamin C, a known mast cell stabilizer, though some people are sensitive to citrus-derived forms of it.
See recipe card for exact ingredients and quantities.
🥬 How to Make Baked Artichoke (Step-by-Step)
Step 1) Preheat your oven to 425°F (220°C), then carefully wash your artichoke in warm water and pat dry with a towel.
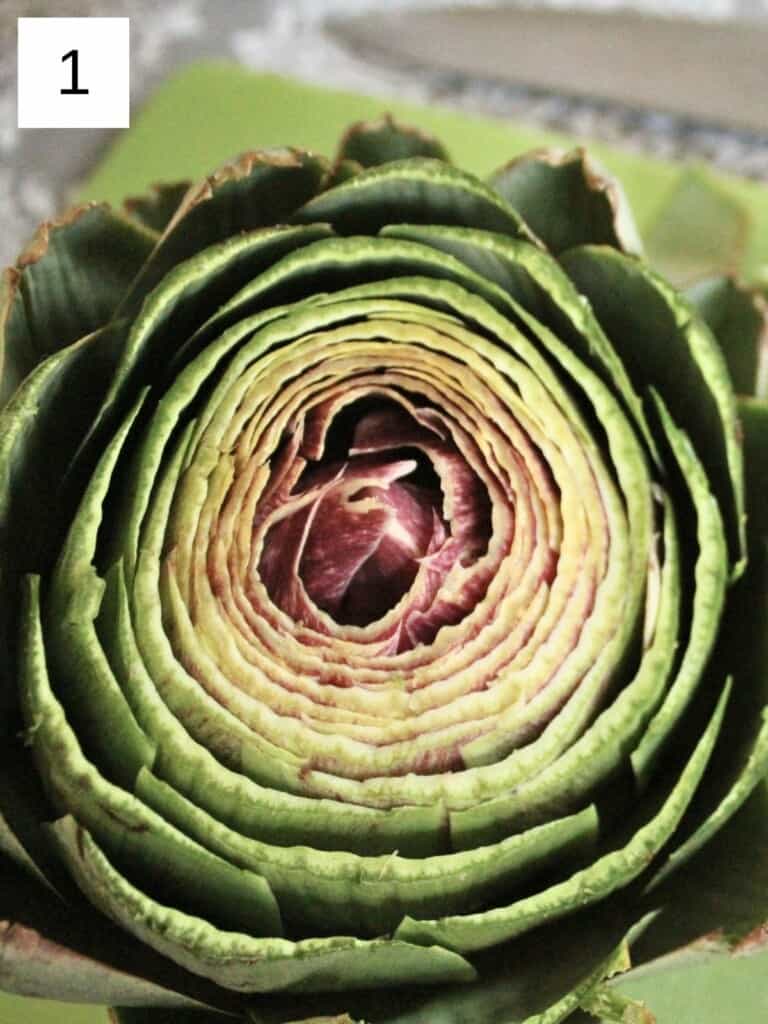
Step 2) Chop your garlic cloves, chop up or juice/zest your lemon, and measure your olive oil. This is the easy part; it is now over. Cut the stem off of your artichoke, and then about 1" (2cm) off of the top to open up the leaves (image 1).
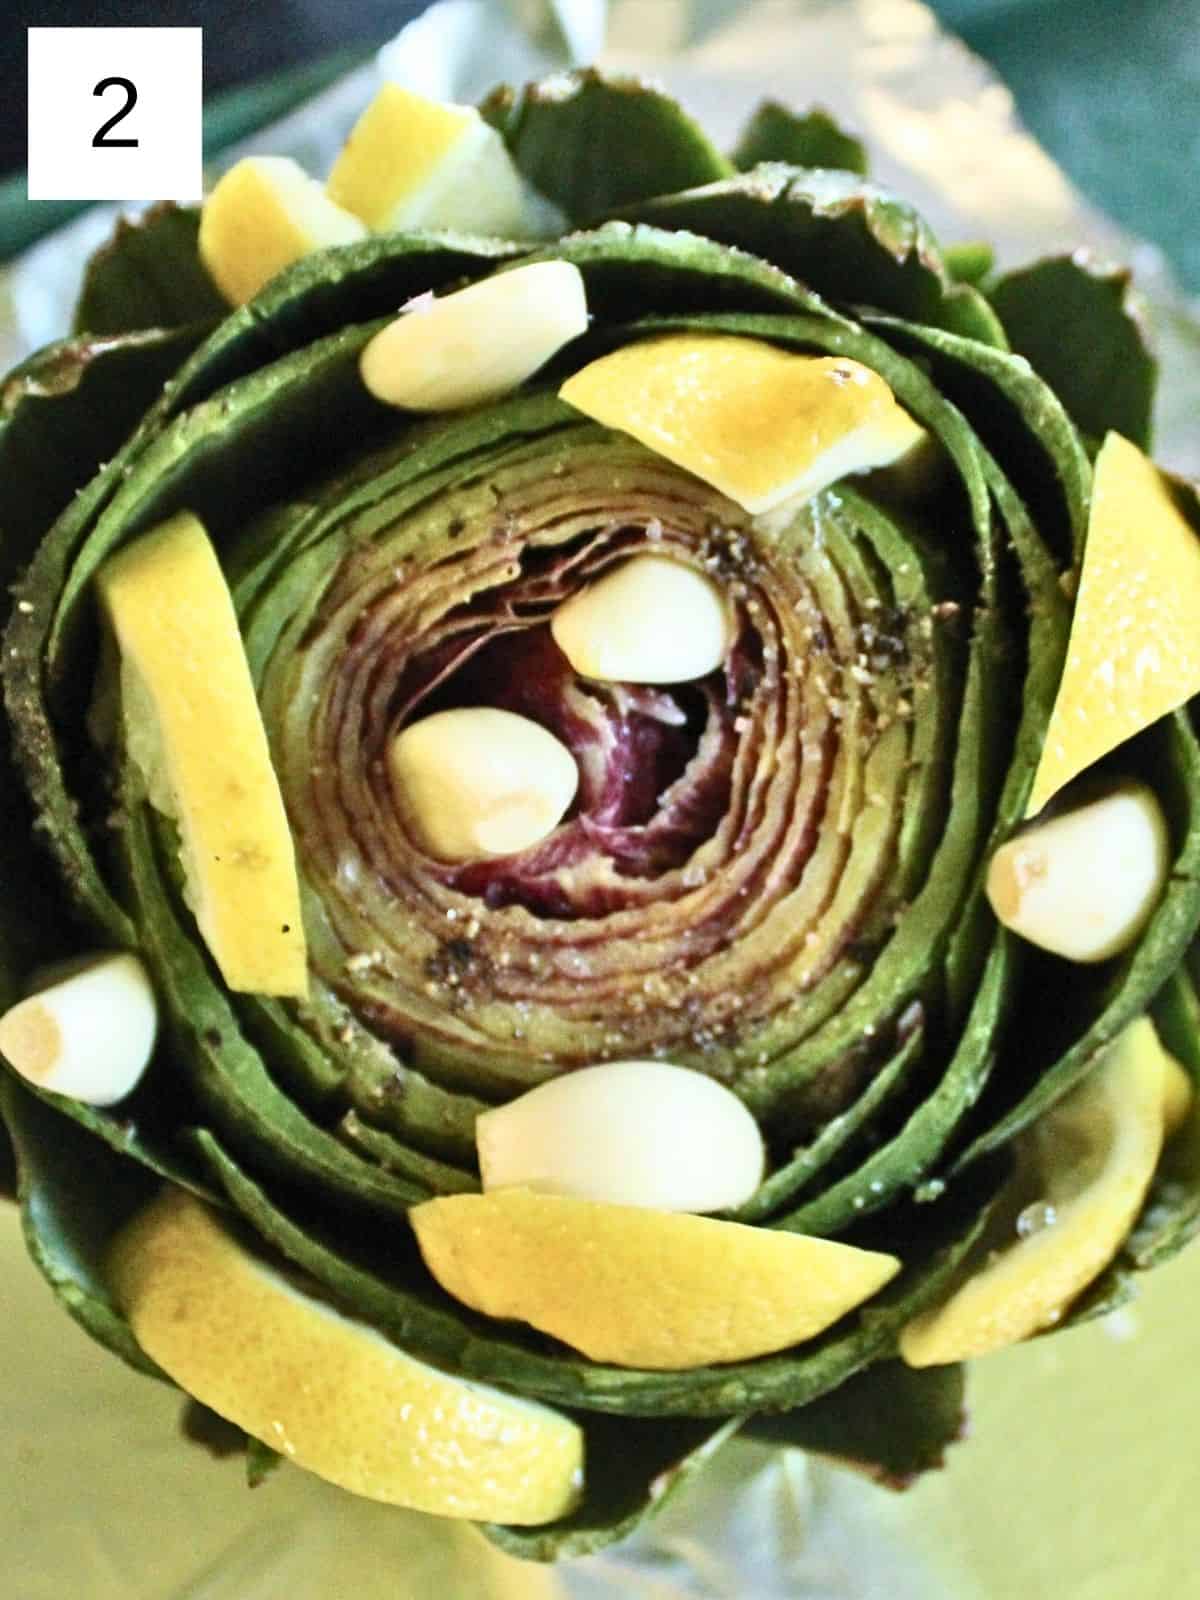
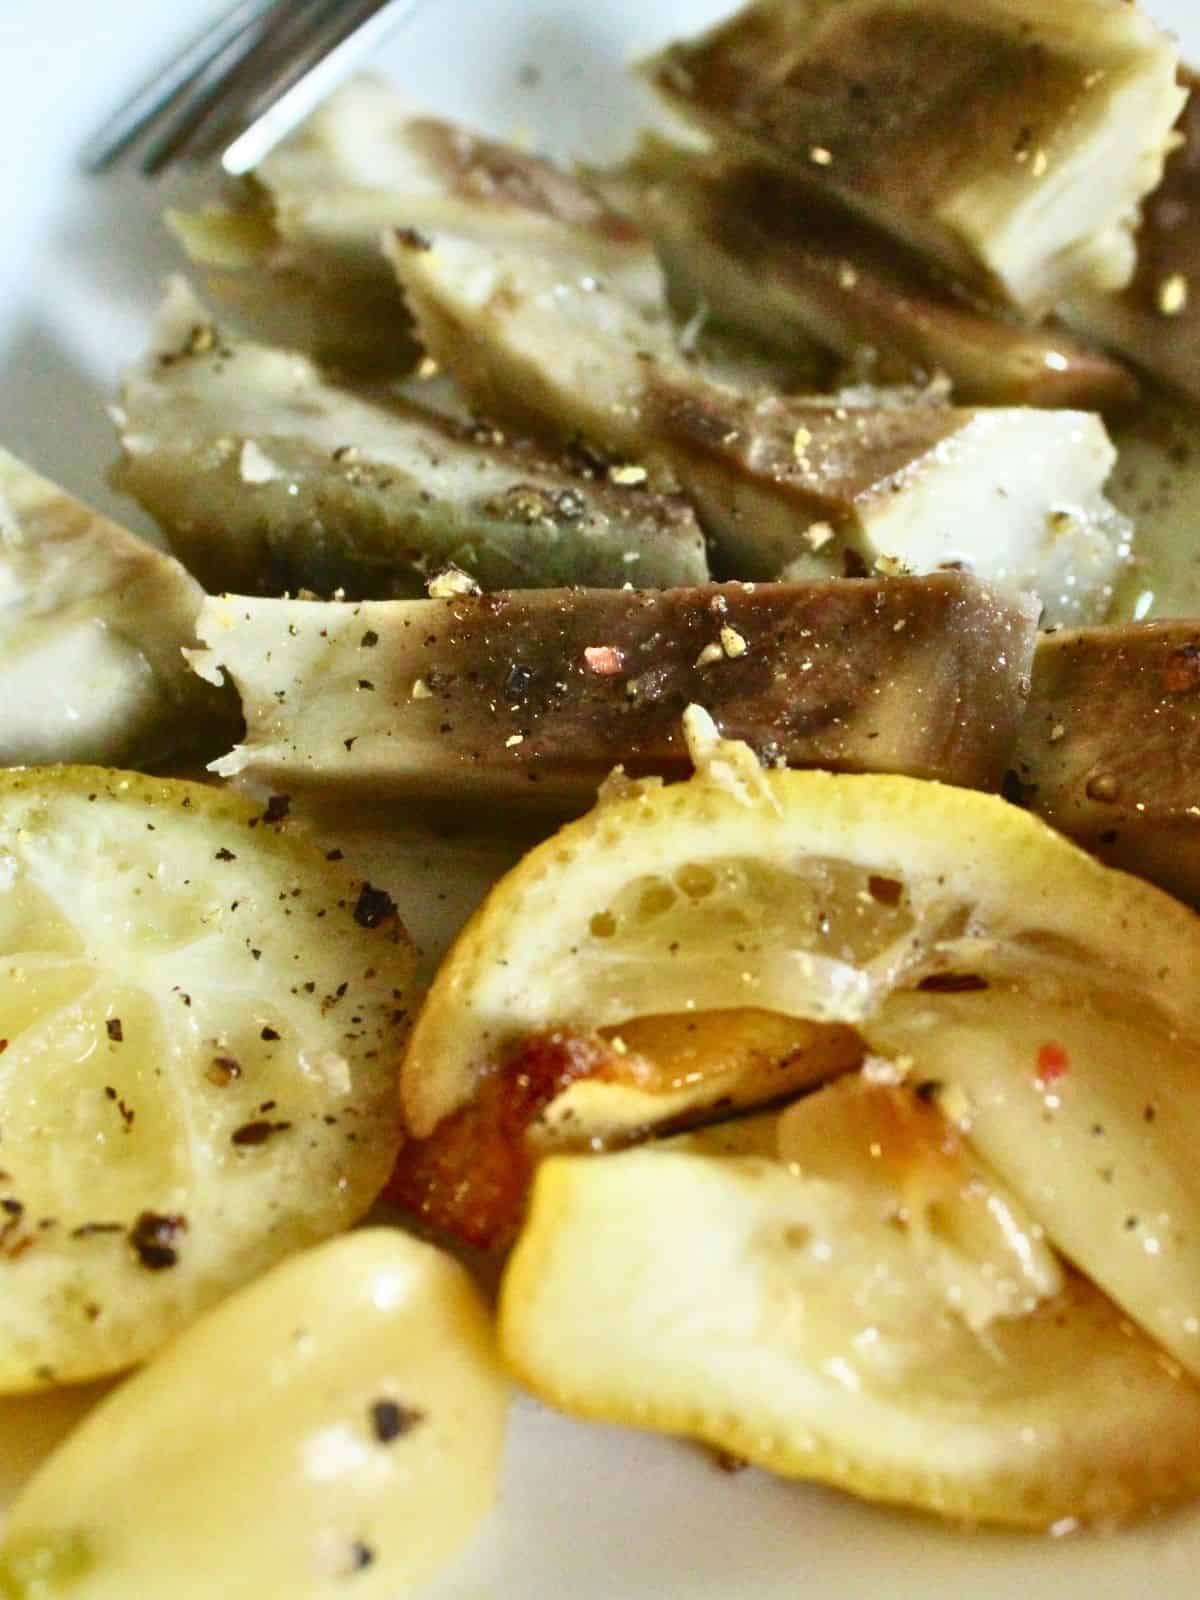
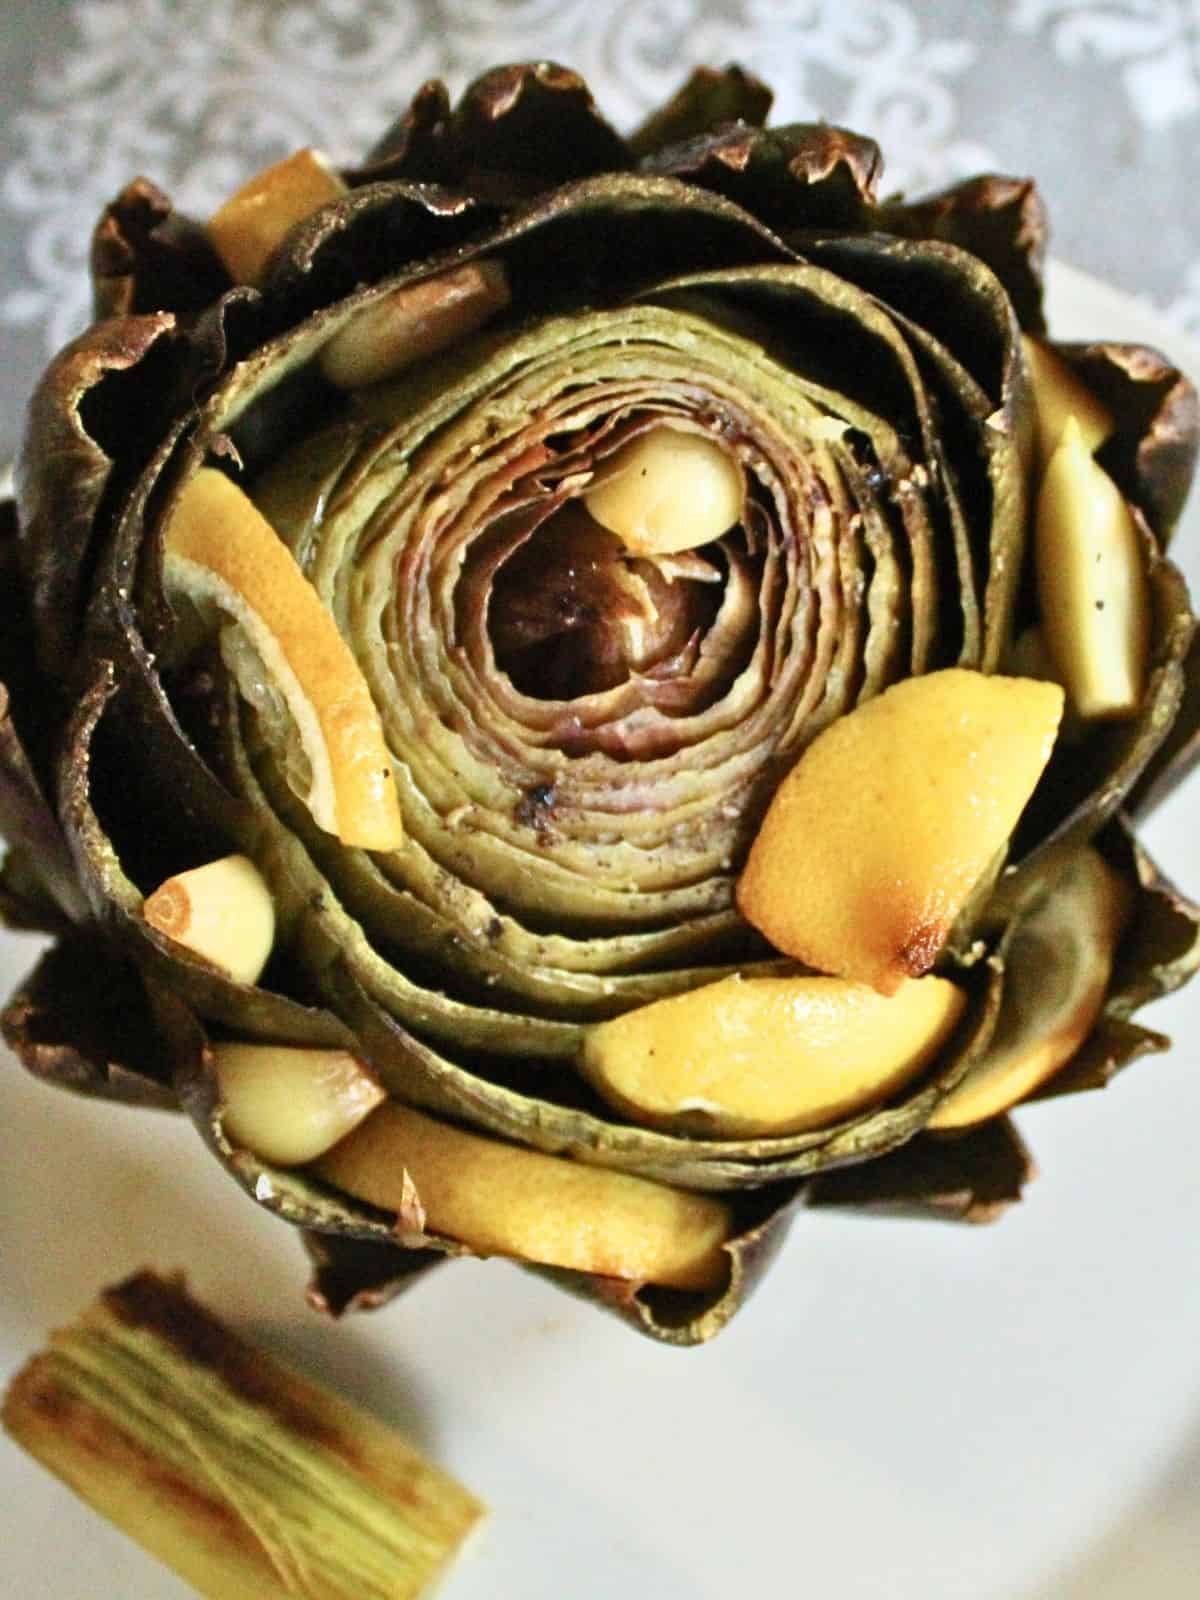
Step 3) Now pull off a piece of aluminum foil and place it on the baking sheet, then place your artichoke on top of the foil. The lemon, olive oil, garlic, and salt are the base flavors from which you'll build your own adventure: tuck the garlic into every crevice you find, and then do the same with the pieces of lemon or pour the lemon juice/zest & olive oil aaaaaall over that sucker (image 2). Feel free to salt & pepper to taste now, but you can also do it after baking.
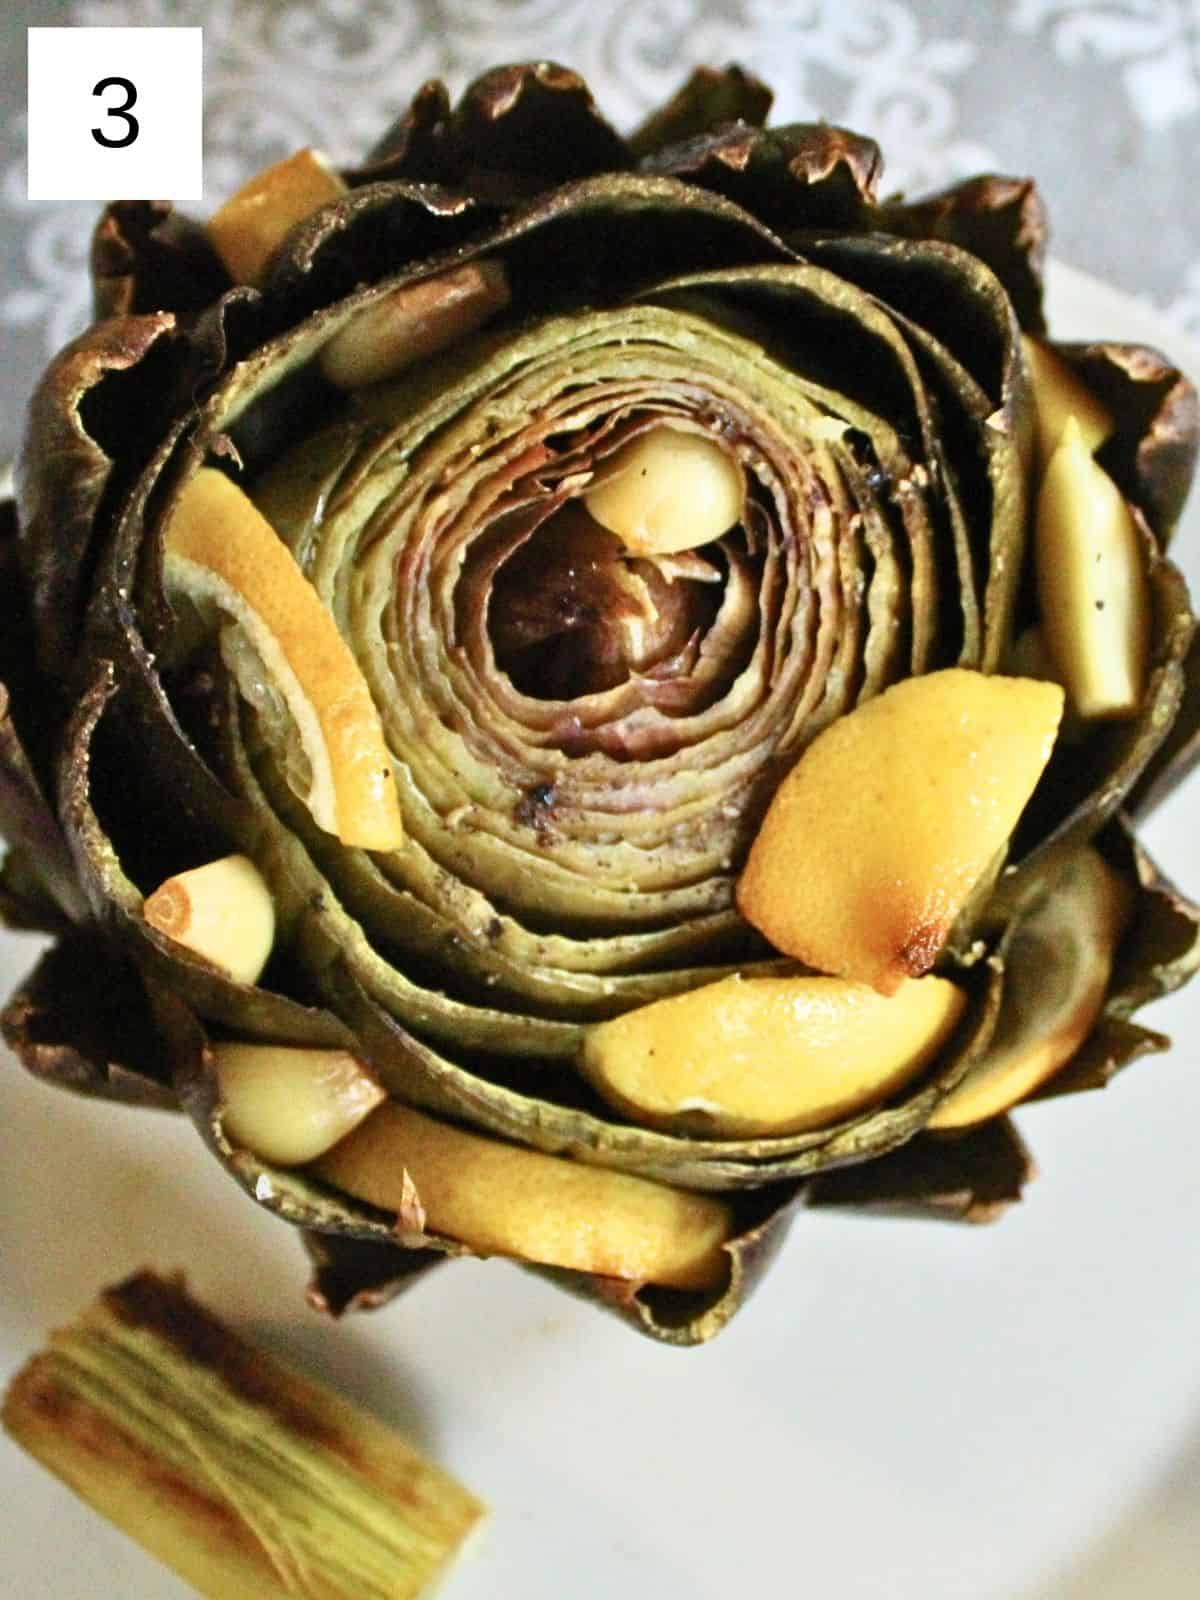
Step 4) Now pull the foil over the top of the artichoke and sort of wrap it like a baseball, then put the baseball on the tray into your preheated oven and bake for 1 hour. Bake for an additional 15 minutes if your artichoke is massive (image 3).
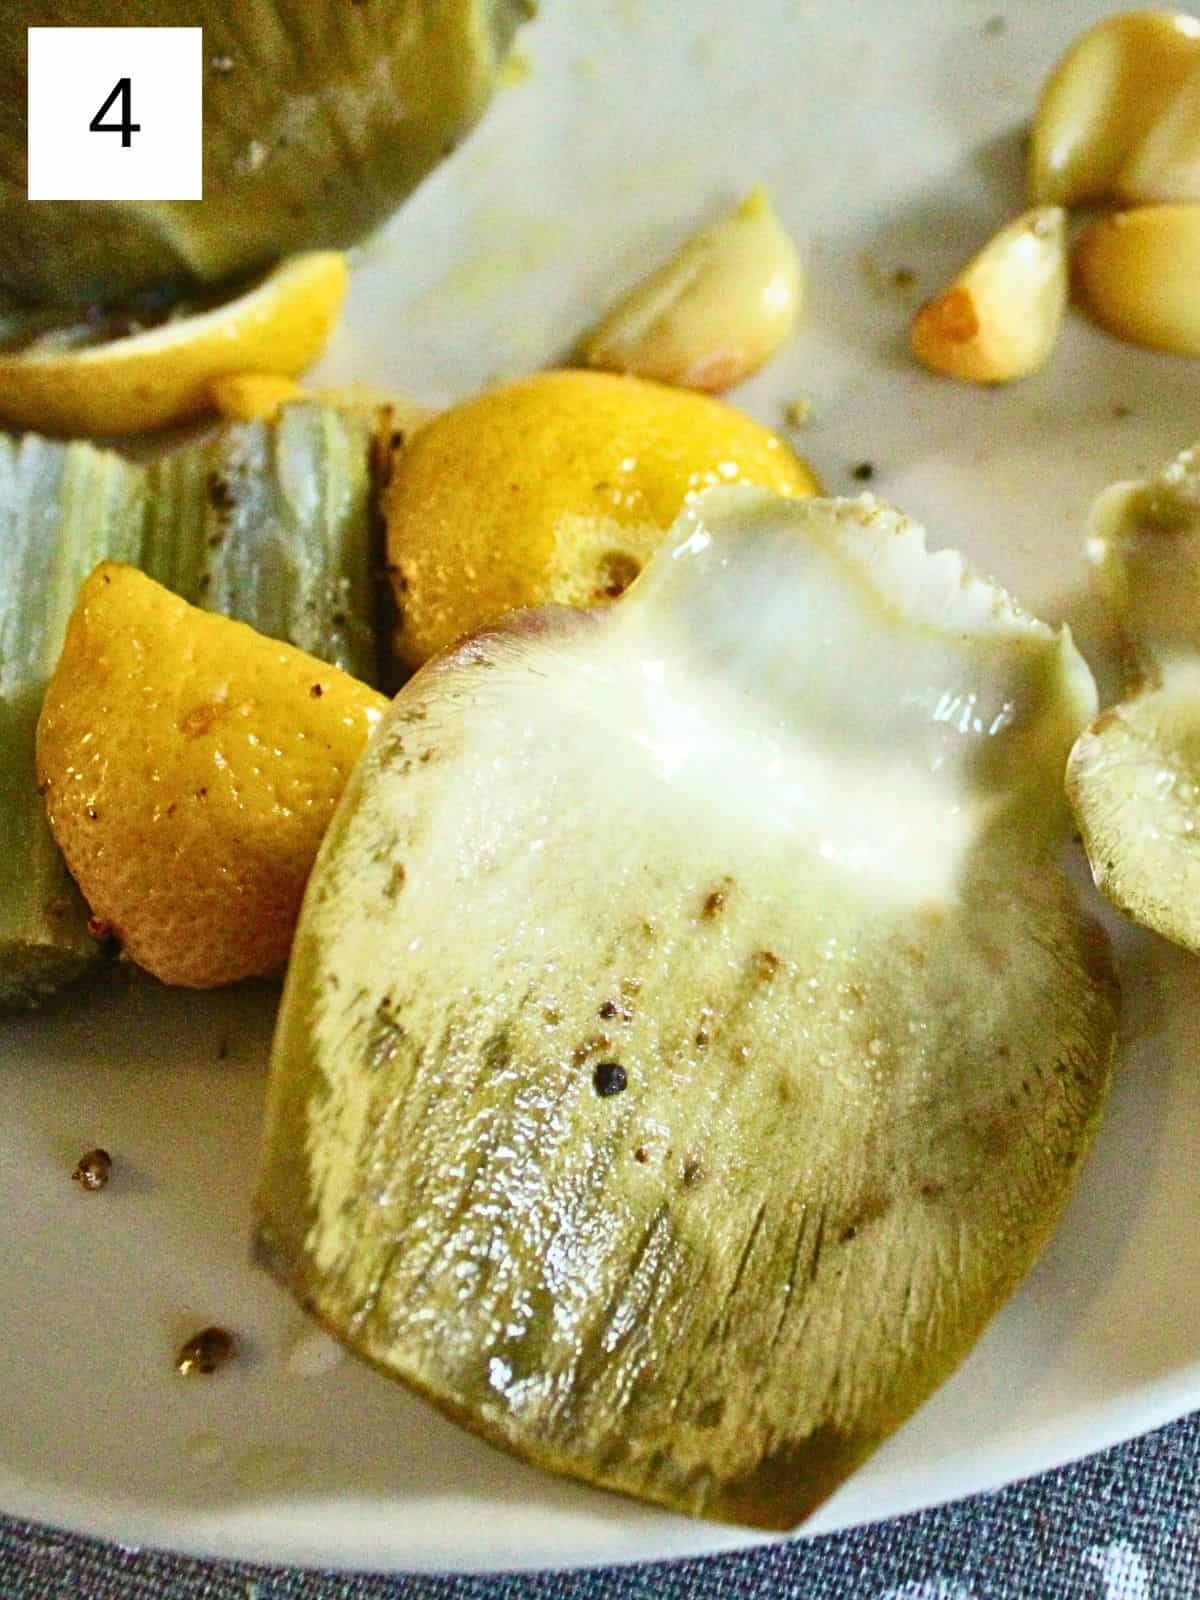
Step 5) Okay. So here's the hard part. This is how to eat an artichoke: peel off the aluminum foil very carefully, and drain the lemon-olive oil liquid into a little dipping cup. Part of the leaves of an artichoke can be edible (in addition to the more common artichoke heart), so after baking, peel off each of the individual leaves (image 4) and make a massive pile for dipping into the sauce.
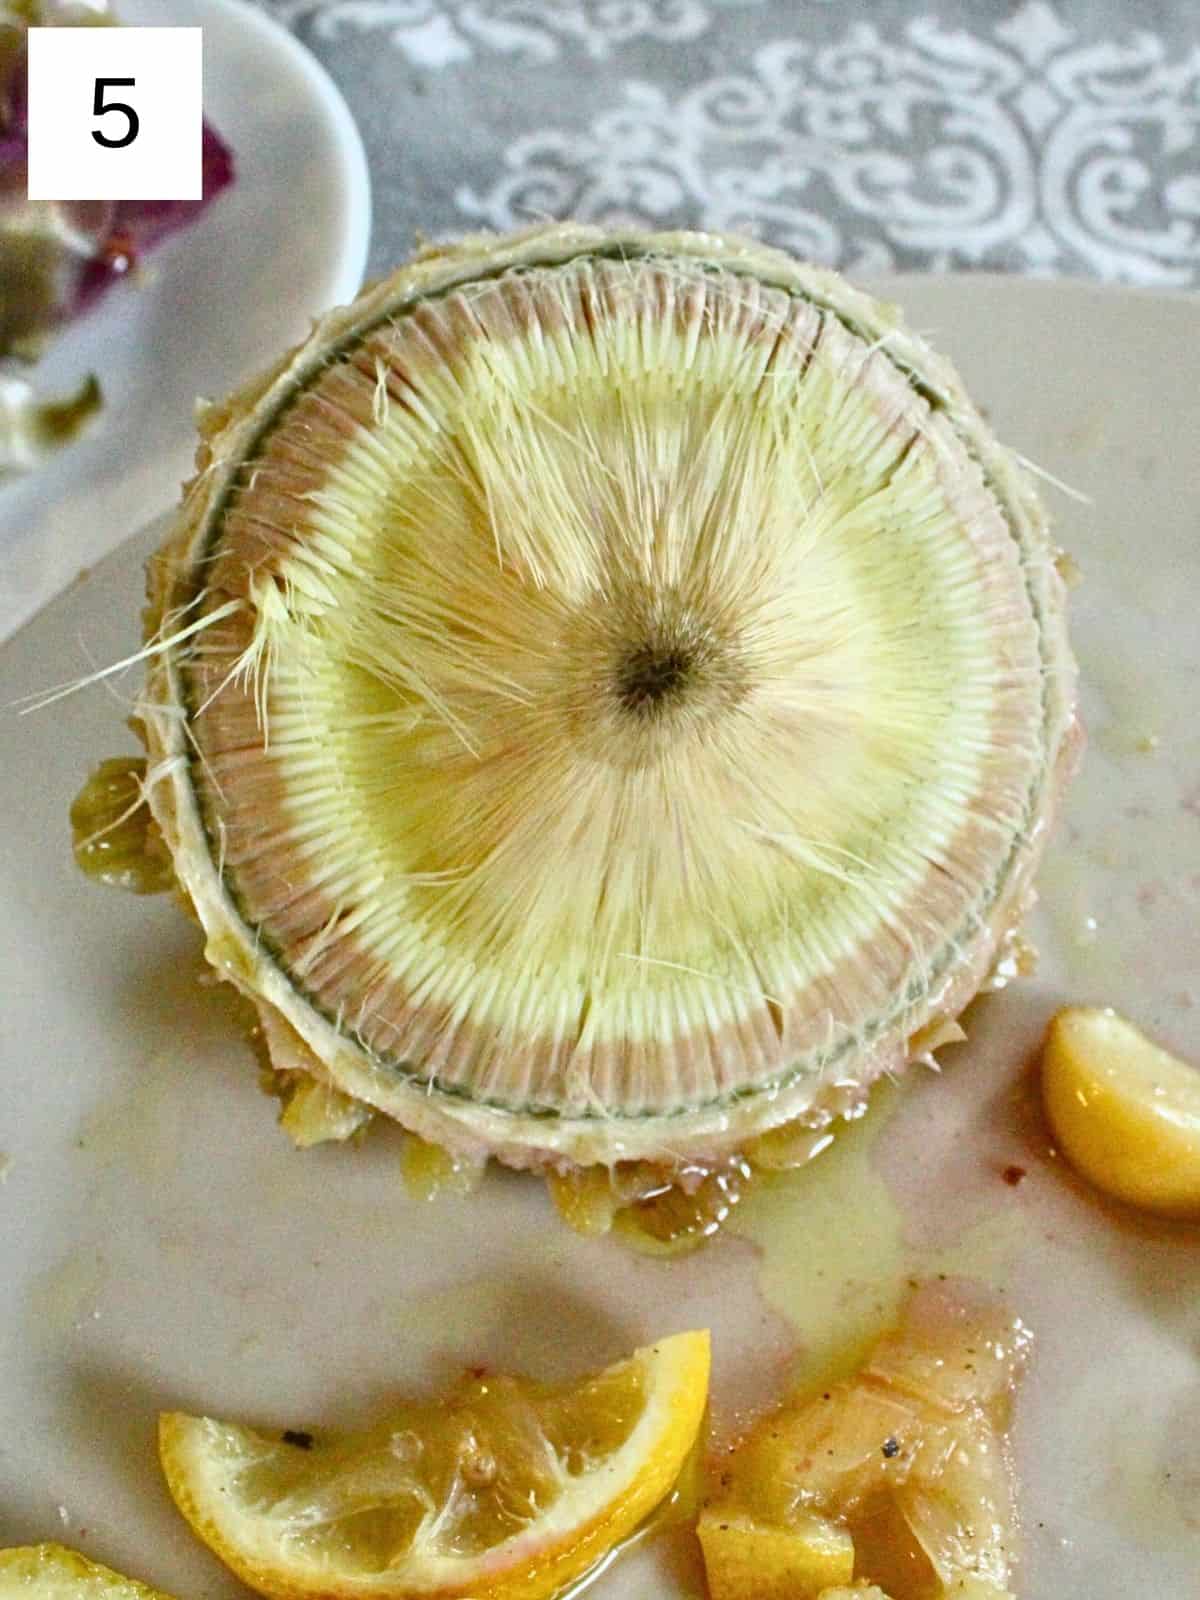
Once you reach the thin leaves with no real heft to them (image 5), just pull those off and put them in the compost; they're inedible. Now you should have a large pile of artichoke leaves and a surprisingly small artichoke heart in front of you. Grab one of the leaves and dip the meatier side into your lemon-olive oil sauce, adding more salt and pepper if needed.
Either scoop the artichoke heart onto a plate for later consumption or start dipping your meaty leaves into your garlicky sauce, pulling off the edible part with your teeth. Discard the leaf once you eat off the meat— I know they're beautiful, but I do NOT recommend trying to eat them. But however you bake your artichoke, enjoy the experience!
🧄 Variations
- Extra Lemon Flavor: Add ½ teaspoon lemon zest along with the lemon juice for a brighter citrus flavor.
- Herbed Artichoke: Sprinkle in a pinch of dried thyme, oregano, or rosemary before baking for a subtle herbal note.
- Garlic-Lovers Version: Increase the garlic to 7–8 cloves for a more robust, savory flavor.
- Milder Garlic Option: Roast the garlic whole instead of minced for a softer, sweeter garlic taste.
- Sumac Finish: Add a light sprinkle of sumac after baking for a tangy, citrus-like flavor without adding more lemon juice.
- Olive Oil & Herb Drizzle: Finish with an extra drizzle of olive oil and a bit of fresh chopped parsley or basil before serving.
♨️ Freezing and Reheating
Honestly, I would not freeze this. It doesn't reheat well unless you like mushy artichoke, so I purposefully just make one artichoke when I make this recipe, as it can easily be doubled or tripled for varying crowd sizes.
However if you need to freeze it, keep in mind that the texture will change hugely - be sure to cook the artichoke beforehand and consider using it in a dip once reheated. If you're not on a low histamine diet, this baked artichoke can stay good in the fridge for up to 3 days when stored in an air-tight container and cooled to room temperature beforehand.
👨🏻🍳 Expert Notes & Tips
Eat Time = ∞
Making Garlic Easy: that you can either chop/mince your garlic, or just cut each clove in half to make quicker work of it. Same for the lemon: you can either juice & zest it, or just cut it into strips to place between leaves.
Enjoy With Friends: Honestly, this was one of the most difficult to sort out recipes that I've ever tried. In the future I'll only be making this as a communal dish, because it was such an involved & active food to eat that it would be fun to eat with friends or family, but can be pretty frustrating to eat alone (if you don't know how little food comes out of it all!). I'm glad I made it, but next time I'll be chopping up some salted pili nuts for imitation cheese on top of the artichoke heart.
🥕 What to Serve With Artichoke


🙋 Frequently Asked Questions
Fresh artichokes are best for this recipe, as canned or frozen options may become too soft and lose their texture when baked.
The leaves should pull away easily, and the heart should be tender when pierced with a fork.
Yes, you can add more garlic for a bolder flavor or extra lemon juice/zest to increase the brightness while keeping it low histamine-friendly.
Yes, it’s dairy-free, made with fresh ingredients, and avoids high-histamine foods, making it ideal for a low histamine diet.

Have you tried this recipe?
If you like the recipe, please leave a 5-star ⭐️⭐️⭐️⭐️⭐️ rating on the recipe card, or even a comment! I love to hear how your recipes turned out, and your feedback can help other readers! Also join us on Instagram, Facebook & Pinterest.
📖 Recipe
Easy Baked Garlic Lemon Artichoke
Equipment
- oven
Ingredients
- 1 whole artichoke
- 2 Tablespoons olive oil
- 1 Tablespoon lemon juice or ½ Lemon, [use a fresh organic lemon for the lowest histamines, and add a bit of zest if you're a lemon lover like moi]
- 4-6 cloves garlic [chopped or minced]
- pinch of salt
Instructions
- Preheat your oven to 425°F (220°C), then carefully wash your artichoke in warm water and pat dry with a towel.
- Chop your garlic cloves, chop up or juice/zest your lemon, and measure your olive oil. This is the easy part; it is now over.
- Cut the stem off of your artichoke, and then about 1" (2cm) off of the top to open up the leaves. (see attached image)
- Now pull off a piece of aluminum foil and place it on the baking sheet, then place your artichoke on top of the foil. The lemon, olive oil, garlic, and salt & pepper are the base flavors from which you'll build your own adventure: tuck the garlic into every crevice you find, and then do the same with the pieces of lemon or pour the lemon juice/zest & olive oil aaaaaall over that sucker. Feel free to salt & pepper to taste now, but you can also do it after baking.
- Now pull the foil over the top of the artichoke and sort of wrap it like a baseball, then put the baseball on the tray into your preheated oven and bake for 1 hour. Bake for an additional 15 minutes if your artichoke is massive.
- Okay. So here's the hard part. This is how to eat an artichoke: peel off the aluminum foil very carefully, and drain the lemon-olive oil liquid into a little dipping cup. Part of the leaves of an artichoke can be edible (in addition to the more common artichoke heart), so after baking, peel off each of the individual leaves and make a massive pile for dipping into the sauce. Once you reach the thin leaves with no real heft to them, just pull those off and put them in the compost; they're inedible.
- Now you should have a large pile of artichoke leaves and a surprisingly small artichoke heart in front of you. Grab one of the leaves and dip the meatier side into your lemon-olive oil sauce, adding more salt and pepper if needed.
- Either scoop the artichoke heart onto a plate for later consumption or start dipping your meaty leaves into your garlicky sauce, pulling off the edible part with your teeth. Discard the leaf once you eat off the meat— I know they're beautiful, but I do NOT recommend trying to eat them. But however you bake your artichoke, enjoy the experience!
Notes
Nutrition
Save this post for later!


Sue says
Besides being histamine intolerant I am also having to be on a Low Fodmap diet. Unfortunately most of the ingredients in your recipes are on the no no list for irritable bowel syndrome/low Fodmap diet
Max says
It is very difficult to cross two already rather restrictive diets - I'm sorry you're having to do that right now, but I hope it gives you a better sense of what's bothering you in the long run! And I certainly hope you're still able to find some delicious recipes to make in the meantime, whether they're from my site or elsewhere. 🙂
Liz says
This looks delicious! I'm a bit confused though. I thought lemons were high histamine?
Max says
Small amounts of lemon and lime juice are often well-tolerated, according to my doctor, and I myself don't have any issues with it. So I do use lemon in some of my recipes, but I'd always recommend testing out ingredients individually before reintroducing them in a recipe. I hope this one works for you!